A healthy hard drive will keep your data safe and allow you to remain productive. But what happens when your hard drive fails?

It’s important that you know what to do when your hard drive fails. After all, you may be working to a tight deadline on a project. Or you may have data saved to your hard drive which hasn’t been backed up elsewhere. Whatever the scenario, the result is the same: you need that hard drive back. While many of these issues are technical and complex, there are also hard drive issues that you can remedy yourself.

Naturally, you won’t know what these are without a little education, so that’s where we step in. And, today, we’re going to look at common hard drive issues and how to fix them.

How to Save Your Hard Drive

If your hard drive has failed, then don’t panic. There’s a good chance that you can carry out a simple repair in the following scenarios:

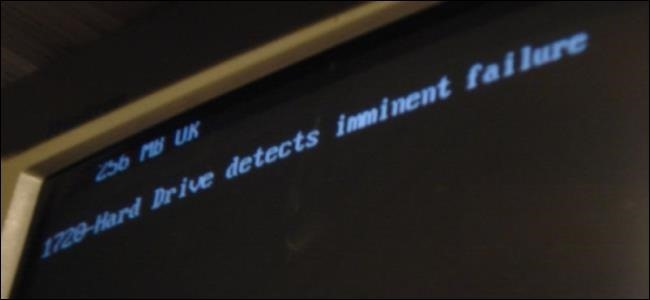
  • Corrupted Hard Drive: You’ll know if you have a corrupted hard drive as your PC will tell you in the boot process. And it won’t let you go any further. A corrupted hard drive can occur for many reasons, such as malware attacks and files being deleted, but fixing this isn’t always rocket science. All you have to do is run a ‘system diagnostics’ check. Once your system starts trying to boot up you will need to press the F2 key (this can vary between different manufacturers) and then select the system diagnostics option. This will run a series of tests and try to fix any existing issues.
  • Full Hard Drive: PCs may have hard drives that can hold substantial amounts of data these days, but this doesn’t mean we don’t push them to their limit. And it’s very easy for a hard drive to quickly fill up. When this happens you’ll find that your PC runs slowly and will be unable to perform certain operations. In these instances you will need to either delete files you no longer need (or transfer them to a storage drive) and uninstall any unnecessary applications.
  • Overheated Hard Drive: If a PC is working too hard then it is going to generate heat. Usually, this can be controlled by the internal fan system. But, sometimes, this isn’t enough due to other factors. Blocked air vents, for example, prevent the internal fans from having air to cool and pass around the hard drive. And a build up of dust can also lead to components becoming insulated and generating excess heat. Therefore, always check that your PCs air vents are clear and that dust is not allowed to build up around the vents.
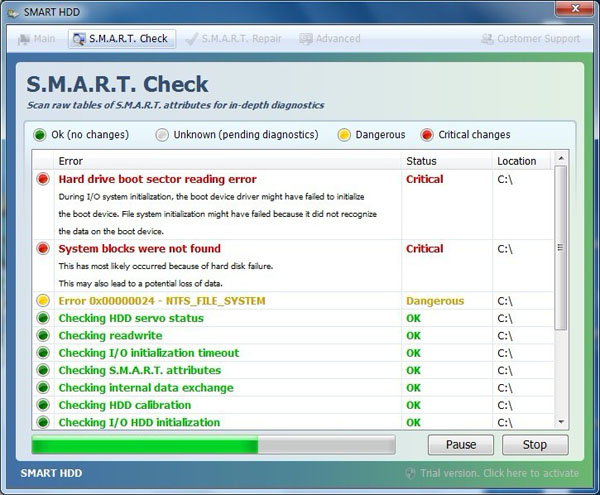
For more ways to secure and optimize your business technology, contact your local IT professionals.

Read More


How Reliable is your Hard Drive?

All hard drives have a limit in terms of space. And this limit can soon be reached. But there are a number of simple ways to free up space.

A hard drive which is full can cause you a number of problems. Speed is the most obvious issue, but the chances of your PC freezing and crashing is also increased. And all of these scenarios are ones that can put a drain on your productivity. Therefore, you need to ensure that you have enough space on your hard drive.

You could expand your storage space, but this can be costly and isn’t always required. Instead, you can restore your PC’s productivity by following our steps to free up space.

Maximizing the Capacity of Your Hard Drive

To start freeing up space on your hard drive you need to make sure you follow these best practices:

  • Disk Cleanup: The simplest way to start maximizing space on your hard drive is with the Disk Cleanup application. This maintenance utility is bundled with Windows and carries out a quick evaluation of your hard drive. Files that are deemed necessary are kept, but there’s also an option to delete unnecessary files. 
  • Uninstall Apps You No Longer Use: A large number of apps will be installed on a PC over the course of its lifetime. But, due to time constraints, these aren’t always uninstalled when they’re no longer required. And this can take up a lot of disk space. So, you need to regularly visit the ‘Uninstall or Change a Program’ section of your Control Panel. Here you can analyze which programs are no longer required and remove them. 
  • Minimize Your System Restore Space: It’s likely that you will have used the System Restore app more than once to fix a system issue. But, over time, all the snapshots of your system can start to take up large amounts of space. Thankfully, you can restrict the amount of space used to store these snapshots. By minimizing the maximum Disk Space Usage you can save space on your hard drive. Just remember that this will also minimize the number of restore points you can access.

For more ways to secure and optimize your business technology, contact your local IT professionals.

Read More


hard-drive-failure

Hard drives are valuable containers of data, so when they fail it can be costly. Therefore, it’s essential you know how to monitor your hard drive’s health.

Now, you don’t need to worry, as you don’t need a PhD in computer health to analyze the health of a hard drive. Instead, you just need to refer to a monitoring system known as SMART (Self-Monitoring, Analysis and Reporting Technology) to investigate whether your hard drive is on the edge of failure.

It’s a good idea to integrate SMART into your monitoring procedures, so let’s take a look at exactly what it does and how to use it.

What is SMART?

Smart-HDD-Virus

SMART helps to keep an eye on your hard drive’s health by monitoring various attributes (up to 30 depending on the manufacturer) present. These attributes may vary slightly in description between manufacturers, but are all essentially the same.

Now, these attributes are assigned certain parameters which can provide definitive information that your hard drive is struggling for breath. And the parameters you really need to pay attention to are:

  • Value – This property indicates the current health of the attribute and starts off as a high number, but declines over the hard drive’s lifetime.
  • Identifier – This provides a description of what the attribute means and is indicated by a number, but will also have a text description too e.g. ‘Reallocated Sectors Count’
  • Threshold – This parameter tells you the failure limit for this attribute, so once the threshold is passed it spells trouble for your hard drive.

How Can You Monitor SMART?

It’s possible to view SMART data by using the ‘command prompt’ option in Windows, but many users are unfamiliar with command prompt, so it’s not always recommended.

Luckily, there are many third party pieces of software such as CrystalDiskInfo which allow easy navigation of SMART data, so it’s well worth downloading as it’s free and tells you everything you need to know.

CrystalDiskInfo

If, however, you do want to go the command prompt route then take the following steps:

  1. Hit the Windows key and do a search for ‘Command Prompt’
  2. Open command prompt and type in the following: wmic diskdrive get status

If your hard drive is working just fine then you’ll get an ‘OK’ status displayed. This can give you a quick bit of reassurance, but you’re unable to get an overall picture of the hard drive’s health with this approach.

What Do You Need to Look for in SMART Data?

Now, having a long list of data in front of you is all well and good, but you need to know what you’re looking for. Thankfully, Backblaze has investigated the most crucial attributes to monitor and these are:

  • SMART ID 5 – Reallocated Sectors Count
  • SMART ID 187 – Reported Uncorrectable Errors
  • SMART ID 188 – Command Timeout
  • SMART ID 197 – Current Pending Sector Count
  • SMART ID 198 – Uncorrectable Sector Count

If these values are sitting at 0 then you can sigh a sigh of relief as it demonstrates a healthy hard drive. Anything above 0, however, and it’s a telltale sign that your hard drive is at risk from failure.

It’s a good idea, though, to keep your eyes on all the attributes to try and identify any potential problems.

For more ways to secure and optimize your business technology, contact your local IT professionals.

Read More


Intel_SSD_straight

Solid state drives are non-mechanical storage devices which reduce load times and replace hard drives. Are solid state drives worth it for a small business?

What is an SSD?

Traditionally, the hard drive of a computer has always been a hard disk drive (HDD) made up of spinning disks covered in a magnetic coating to allow data to be read/written.

An SSD, however, has no moving parts and is powered by Flash memory. Essentially it’s a giant USB memory stick. And we all know how much quicker they are than fiddling round with disks!

SSDs, therefore, have become increasingly popular due to the speeds offered. In fact, sales of SSDs are currently doubling each year as HDD sales fall.

But what is it about SSDs that make them so appealing?

The Benefits of an SSDComparison-SSD-vs-HDD

Increased Speed

We all get frustrated with the load up times for our computers and it’s even more irritating for business users who need to connect to numerous networks. However, by replacing an HDD with an SSD, users can find a 1 minute load time reduced to 15 seconds.

And it’s not just operating systems that receive this sprightly boost. Software such as Microsoft Office will also load in a fraction of the time.

Where SSDs really excel is their capacity to read and write data at speeds that are double that of an HDD. This results in a much quicker rate for creating and transferring files.

There are never enough hours in a business day, so anything which increases work time is a real bonus.

Better Data Integrity

A huge benefit of SSDs is that they’ll never crash and take all their data to silicon heaven. They simply stop writing data and preserve the current data load. Anyone who’s ever lost data to a hard drive crash will know that this is invaluable.

No Moving Parts

The fact that SSDs have no moving parts brings a number of benefits to your computer.

The main area of concern for a business is the process of wear and tear on an HDD due to the intense pressure the disk is put under by running at up to 7200rpm. An SSD, though, is never going to wear out and die.

No moving parts also make SSDs more energy efficient and help promote your business’ green image.

Is an SSD Worth the Extra Cost?

You’re probably getting quite excited over the prospect of SSDs, but they do have one drawback – the cost.

A 128gb SSD costs around $40 at the time of this writing, but a 160gb HDD can be as low as $15. This may not be a huge difference for a one off consumer, but if you’ve got a workforce of 50 computers then it begins to get pricey!

However, costs are dropping rapidly – as with all new technology – so SSDs are only going to become more affordable. You’re getting more bang for your buck with SSDs due to the increases in speed and reliability they offer.

For a small business, SSDs offer an exciting upgrade which will increase productivity and help your business reach the next level.

For more ways to secure and optimize your business technology, contact your local IT professionals.

Read More


Onsite_PC_Solution_How_To_Encrypt_Your_Hard_Drive

Do you ever worry about someone getting a hold of the data on your computer after stealing it from you?  With disk encryption, the information on your computer is unreadable without a key.

You may use encryption to protect specific directories or the entire hard drive. The latter is referred to as full disk encryption.

While there are many applications that perform full disk encryption, we recommend True Crypt. While some may lampoon this recommendation based on an announcement from its old source page, development of TrueCrypt has continued in Switzerland by a team committed not to compromise the software with legal limitations.

After downloading TrueCrypt from the new site, launch it normally if you have a disk burner, also known as a a CD/DVD-RW drive.  The disk burner will be required in later parts of the installation. If you do not have a disk burner, there is a workaround that will still allow you to proceed with encryption even though the program does not normally allow it.  For more on this workaround to allow to the program to launch without the disk burning requirement, consult the following article.

After you launch the program, click the System button at the top bar and select Encrypt System Partition/Drive.

1st_window

For Type of System Encryption, select Normal. Click Next.

Normal

Unless you have a RAID driver or hidden partition at the end of your drive, Yes is the best option when you are presented with the Encryption of the Host Protected Area window.

encryption of the host protected area

When you are asked if it is OK for TrueCrypt to make changes to the hard drive, click Yes.

changes to hard drive

TrueCrypt will then see if there are any hidden sectors at the end of the drive. Click Next when it is finished.

detect hidden sectors

Click Next again after selecting whether the computer has a single- boot or multi- boot configuration. If you are running only one version of Windows and no other operating systems, you will choose Single-boot.

single or multiple boot

For the Encryption Options, AES is usually a good choice. And full disk encryption only supports the RIPEMD-160  hash algorithm. Click Next.

hash algorithm

Choose a password for encryption. Choose a strong password of at least 20 characters. Click Next.

password

In the next window, make random movements with your mouse for about a minute. TrueCrypt will collect data from these movements. Click Next.

random

When User Account Control asks if it is OK for TrueCrypt to make changes to the hard drive, select Yes.

uac

Click Next after TrueCrypt generates the encryption keys.

keys

TrueCrypt will then create the ISO image of the Rescue Disk that will be needed if something happens to your boot image. The ISO image will be created in your Documents folder.

burn disk

TrueCrypt will next launch the Windows Disk Image Burner to write this image to a blank CD ROM. Because you will need this disk to access your computer if your boot image becomes corrupted, TrueCrypt will not let you get to the next step until you burn and verify the disk. Choose the correct drive to burn the image to, load the blank CD ROM, and click Burn.

burn

TrueCrypt will verify the disk after burning it. After it has been verified, click Next.

verified

The Wipe Mode allows you to choose how to wipe all traces of previous data that was unencrypted. Typically these were files deleted before this encryption was started. If there was nothing sensitive on this computer that was deleted, click Next.

wipe mode

Next click Test to allow TrueCrypt to make sure everything is working.

test

When TrueCrypt displays instructions telling you what to do when the system fails to reboot, it is advised that you print these out for reference. Then click OK. Click Yes to reboot your computer.

After the computer restarts, you will need to enter the encryption password.

reboot password

If you enter it correctly, you will be able to log into Windows. After you log in, TrueCrypt will start up automatically. Click Encrypt to start the encryption. Print the instructions showing what to do if the process is disrupted and click OK. When User Account Control asks if you want to allow TrueCrypt to make changes to the hard disk, click Yes. During the encryption, you may do other things on your computer. The encryption should take a few hours.

encryption

You may pause and defer the completion of the encryption to a later time. But until it finishes, the information on your computer will not be fully secure. When encryption is complete, click Finish.

For more information, consult your local IT professionals.

Read More