
All hard drives have a limit in terms of space. And this limit can soon be reached. But there are a number of simple ways to free up space.
A hard drive which is full can cause you a number of problems. Speed is the most obvious issue, but the chances of your PC freezing and crashing is also increased. And all of these scenarios are ones that can put a drain on your productivity. Therefore, you need to ensure that you have enough space on your hard drive.
You could expand your storage space, but this can be costly and isn’t always required. Instead, you can restore your PC’s productivity by following our steps to free up space.
Maximizing the Capacity of Your Hard Drive
To start freeing up space on your hard drive you need to make sure you follow these best practices:
- Disk Cleanup: The simplest way to start maximizing space on your hard drive is with the Disk Cleanup application. This maintenance utility is bundled with Windows and carries out a quick evaluation of your hard drive. Files that are deemed necessary are kept, but there’s also an option to delete unnecessary files.
- Archive Old Files: Files of a certain age may not be required regularly. But keeping them may be necessary for reference purposes e.g. financial reports. However, there’s no need to keep them on your hard drive. Rather than taking up valuable real estate on your hard drive, you should move them to external storage formats e.g. cloud storage or external hard drives.
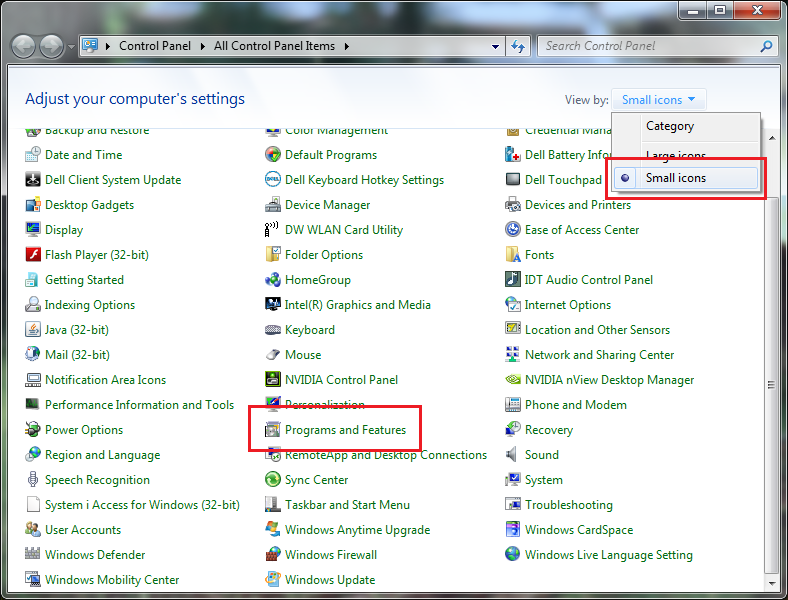
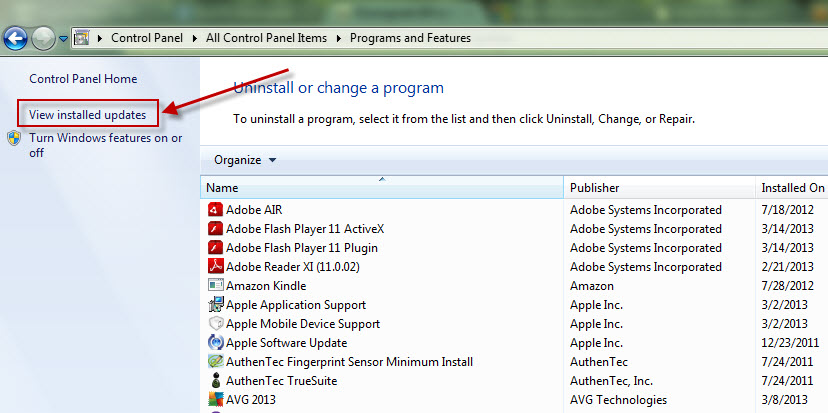
- Uninstall Apps You No Longer Use: A large number of apps will be installed on a PC over the course of its lifetime. But, due to time constraints, these aren’t always uninstalled when they’re no longer required. And this can take up a lot of disk space. So, you need to regularly visit the ‘Uninstall or Change a Program’ section of your Control Panel. Here you can analyze which programs are no longer required and remove them.
- Clean out Temporary Files: A sure fire way to free up some space quickly is to clean out your temporary files. Your internet browsers, for example, generate a large amount of data which is stored on your hard drive. And the Disk Cleanup utility does not touch these files. However, third party apps such as CCleaner are more than capable of tracking down all your temporary files and quickly deleting them.
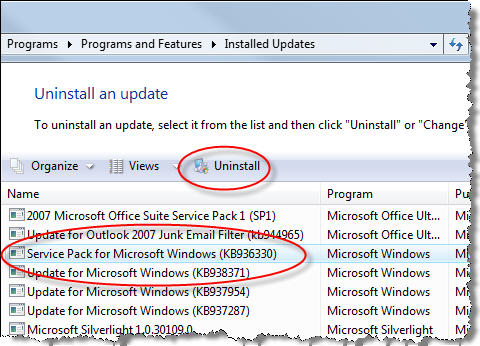
- Minimize Your System Restore Space: It’s likely that you will have used the System Restore app more than once to fix a system issue. But, over time, all the snapshots of your system can start to take up large amounts of space. Thankfully, you can restrict the amount of space used to store these snapshots. By minimizing the maximum Disk Space Usage you can save space on your hard drive. Just remember that this will also minimize the number of restore points you can access.
For more ways to secure and optimize your business technology, contact your local IT professionals.
Read More