Onsite_PC_Solution_Office-2013-Logo

Do you have Microsoft Office 2013?  If so, read on before you install the latest Windows updates released on June 10, 2014 which could break your Office install.

Many users have been reporting this update has been causing stability issues in Office 2013.  Some worst case scenarios involve having to completely re-install Office 2013 after the update.

All Onsite PC Solution managed services clients will be protected during their monthly routine maintenance.

If you haven’t installed the updates for June 10-11th

You can selectively filter out the updates for Office 2013 by following these steps:

4-new-windows-update-pop-up

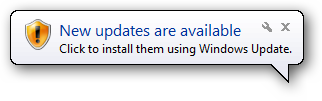
First, if Windows is offering you updates, click the update prompt at the bottom of the screen shown above. This will bring you to the Update Center.

Windows_Update_Center

Do not summarily click the Install Updates box. Instead click the important updates that are available and review them.

updates_available 

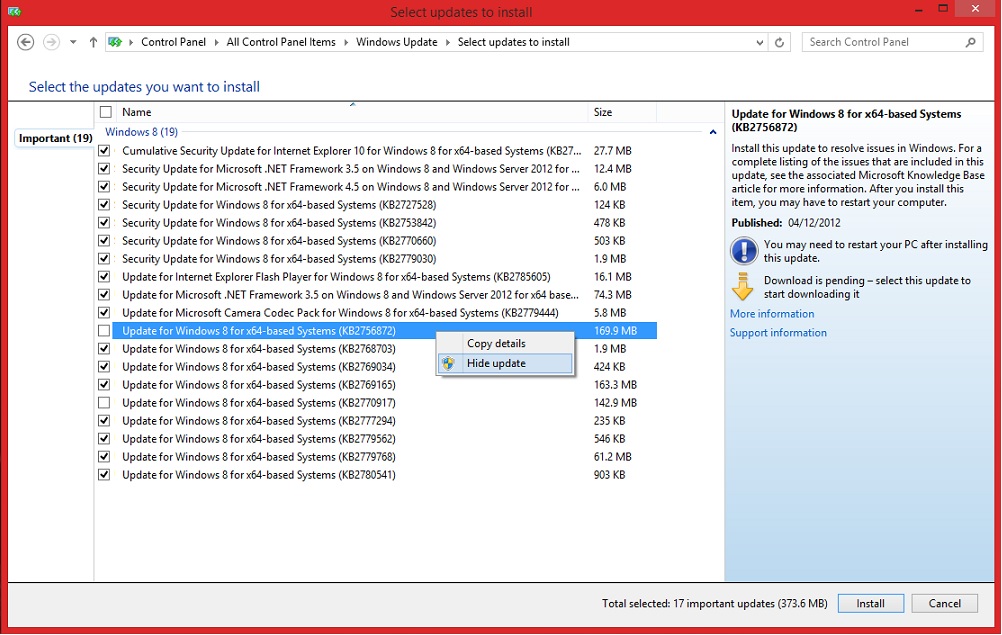
Uncheck any updates that mention Microsoft Office 2013 or KB2971668.  Click Install. When you are sent back to the Update Center, go through the same steps for the optional updates that you went through for the important updates. In the optional updates, we recommend not installing anything related to Bing as these are unnecessary and may slow your computer down. Finally, click Install to go back again to the Update Center, then click Install Updates.  

This will give you all the latest updates for Windows without the problematic update that may corrupt your Office 2013 installation.

If you already installed the update and Office 2013 is broken

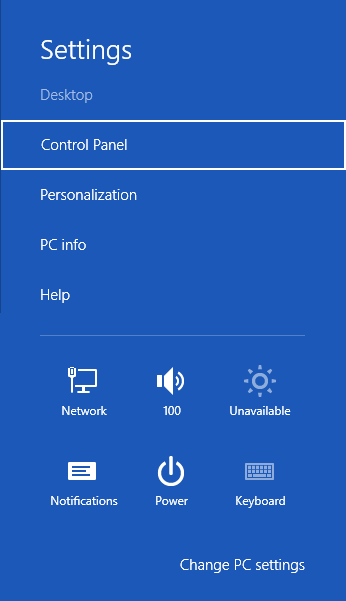
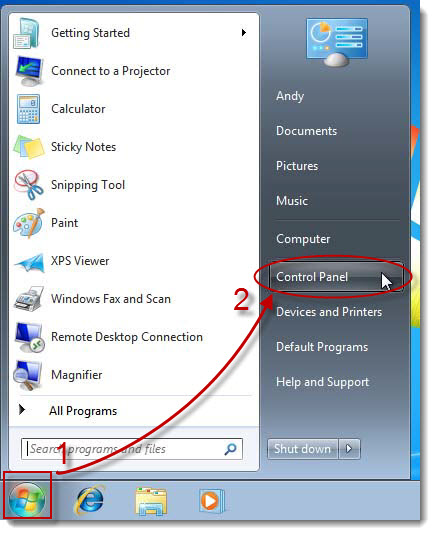
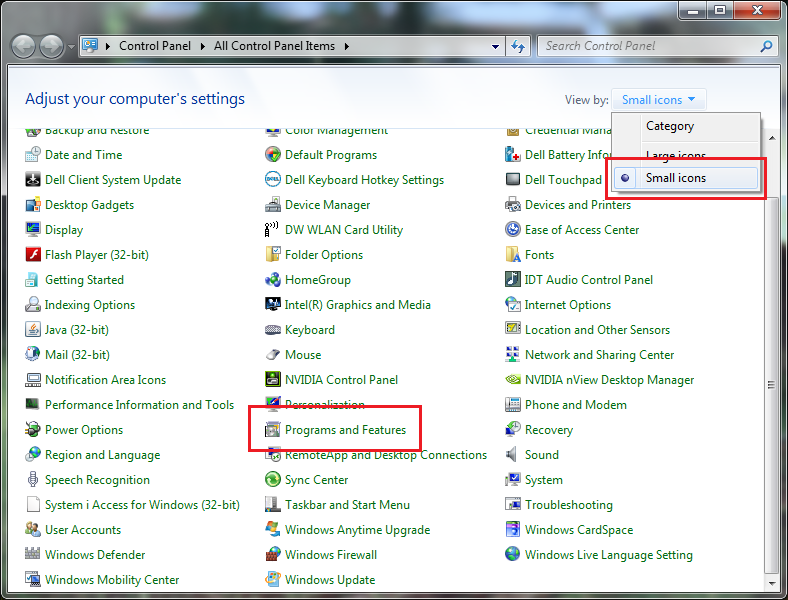
First uninstall the update. To do this, click the Start button and select Control Panel.

start-control-panel-windows7

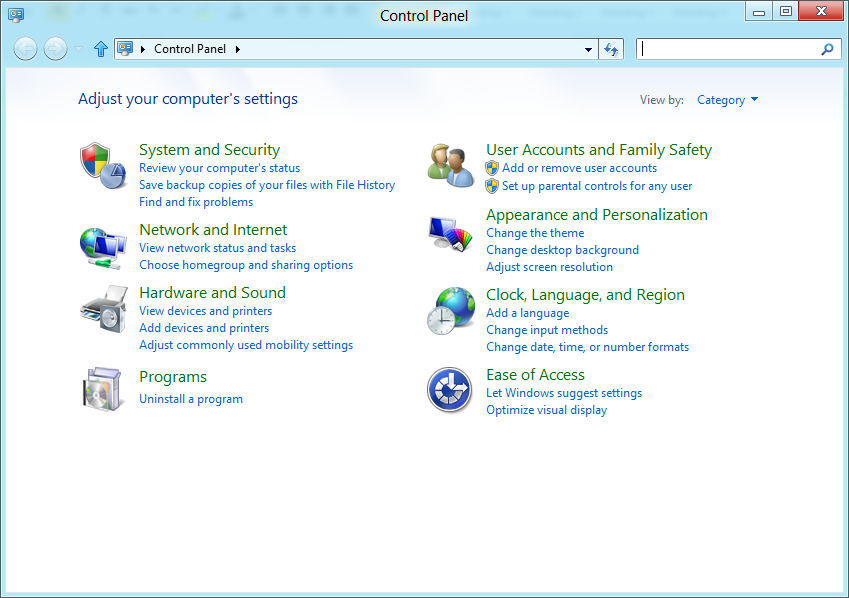
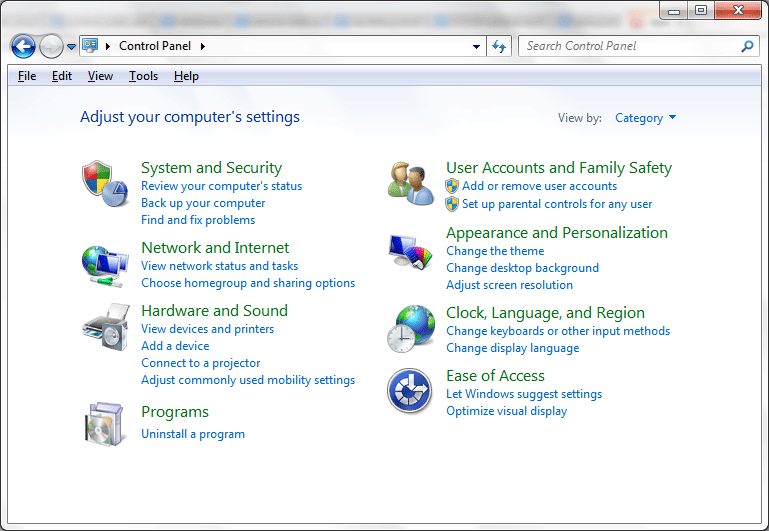
Next click either Uninstall a Program or Programs and Features.

windows-7-control-panel-screen-categories

programs_features

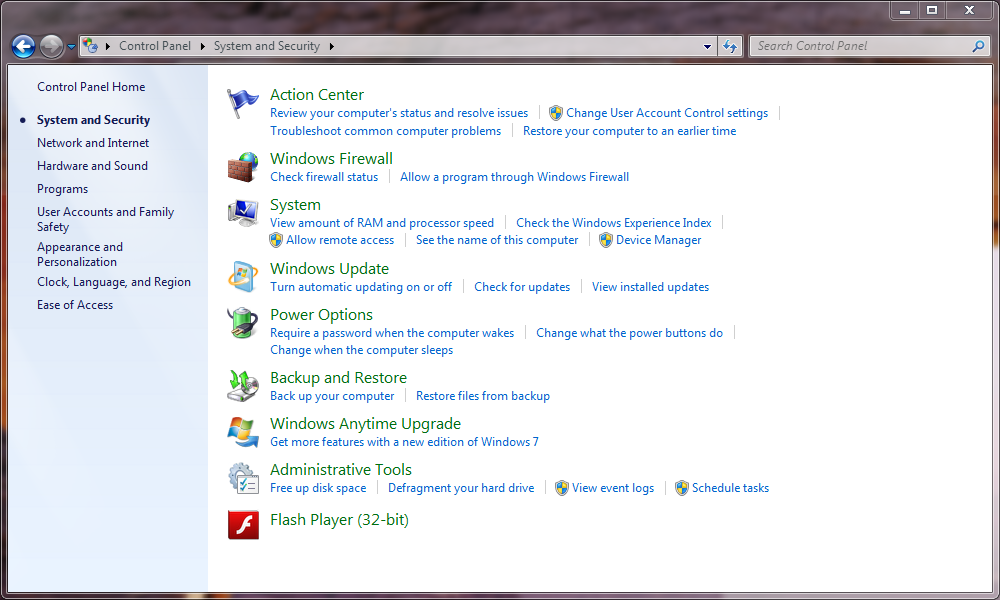
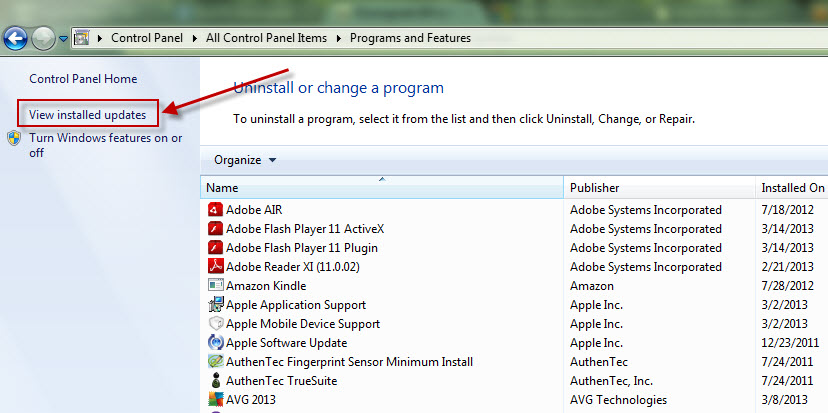
In the Programs and Features window, click View installed updates.

3-View-Installed-Updates

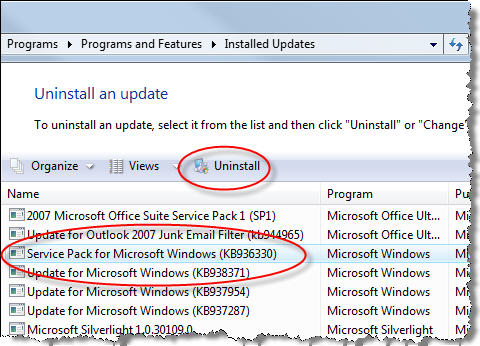
From the list of installed updates, find any that involve Office 2013 dated June 10-11 2014 or KB2971668.  Click to highlight them. Then, when given the prompt,  uninstall them.

eb_uninstall_vista_sp1

After you uninstall all the Office 2013 updates dated the week of June 10th 2014, you will need to completely remove Office using the steps in this article.

For more information, consult your local IT professionals.

Read More


How to burn CDs with free and open source Infrarecorder

If your new laptop or desktop has a built in CD or DVD drive, chances are you can create your own music, data or live disc. Live discs allow you to boot outside of your Windows operating system to try other operating systems like Linux, or to troubleshoot problems.

Infrarecorder is easy to use, free, open source and will enable you to create a CD or DVD with your data, music or a live disc from an iso file.

First download the installer. If you are running 64 bit Windows, choose the x64 version.  Here’s how you can check if you need the x64 or x86 (also known as 32 bit) version.

Once downloaded, open the downloaded program and install Infrarecorder.  Once installed double click Infrarecorder from your desktop or the Start menu to open it.

IR_main_window

To burn an image file, from the list of options, select Write Image. Browse to the directory where the image file is located.

browse

Select Open, check or uncheck the options you prefer for burning, then select OK. Infrarecorder will now burn the image file.

To burn a data or music disc, select the appropriate option in the first step above.

For more information, consult your local IT professional.

Read More


Should you install 32 bit or 64 bit software?

Do you need to install new software but do not know whether you can use the 32 or 64 bit version?  In general it is better to use 64 bit software as it can use more physical memory and take advantage of your computer hardware’s other 64 bit features.

You can use 64 bit software if you are running 64 bit Windows.  Here’s how you can check.

In Windows 7 or earlier versions , click the Start button on the lower left and select Control Panel from the menu.

start-control-panel-windows71

In Windows 8, drag your mouse to the right of the screen and allow the charms to appear.

click-settings-in-charms-menu

Select Settings and Control Panel. 

Windows-8-Settings-Charm-Control_Panel

In the Control Panel options, select either System or System and Security then System, depending on the type of menu you are presented with.

System_and_Security6038.image_46DA0803

System_and_Security

In the System window, the System type field will show you the number of bits Windows is.

#bits

As more and more hardware and software vendors support 64 bit, consumers are able to take advantage of 64 bit features like bigger memory space.  For more information, consult your local IT professional.

Read More